I still remember the first M1 Carbine that made me slow down at a show table. The tag said Winchester. The rear sight towered over the receiver, the barrel band wore a bayonet lug, and the stock sat low around the operating slide. It looked clean. It also looked like it had lived a few lives. That carbine is where this guide really began, because it forced the right questions. What am I actually looking at? What changed from Inland to Winchester? How do the Type I, II, and III parts fit into the story? And what should I check before I hand over cash for a rifle pushing eighty?
Let’s walk through a practical way to read a U.S. M1 Carbine. We’ll start with what the roll mark can tell you, move through the three big features you can spot from across the room, get into the helpful maker markings hiding on small parts, and finish with an inspection checklist that separates a solid shooter from a headache.

Inland to Winchester: what the roll mark really tells you
On a carbine, the receiver roll mark is the headline. Inland Division of General Motors produced the lion’s share during the war. According to data compiled by M1 Collectors Club, Inland made over 2.6 million carbines. Winchester’s name draws a crowd for good reason, and they turned out a substantial number as well, with totals noted in that same source at roughly 828,000. Ten wartime manufacturers produced U.S. GI M1 Carbines, and parts were intentionally standardized to interchange.
Here’s the trick. The roll mark tells you who made the receiver, not the entire rifle. Wartime assembly, field repairs, and especially postwar arsenal work mixed parts freely. It’s not unusual to see an Inland receiver wearing a Winchester trigger housing, an Underwood slide, and a rear sight from a postwar contractor. That is normal, and it is often correct for a carbine that went through rebuild programs. Paying a heavy premium only for a desirable roll mark without considering the rest of the story is where buyers get burned.
Three features you can read from across the room
If you learn to read three items at a glance, you can place a carbine in time and guess what happened to it later: the barrel band, the rear sight, and the stock profile.
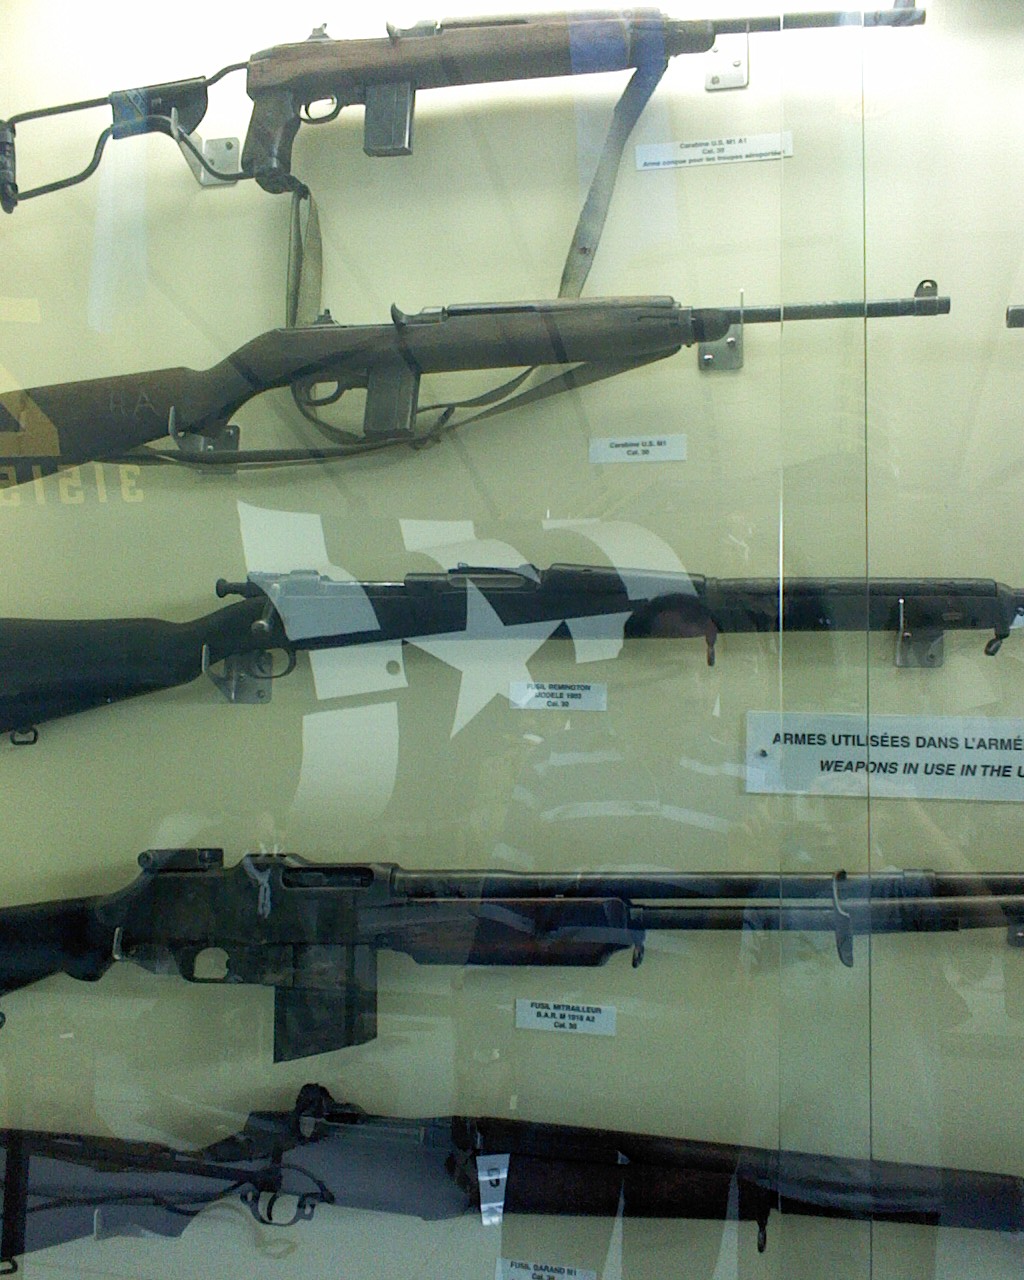
Barrel bands: Type 1, 2, and 3 and who marked what
Collectors talk about three barrel band styles that showed up in wartime and then again in postwar work:
- Type 1: The early narrow band retained by the band spring. It is the band you see on the vast majority of WWII carbines as they were issued in the field.
- Type 2: A wider band that appears mid 1944 on some late-war rifles. Think of it as a stability upgrade.
- Type 3: Essentially a Type 2 with a bayonet lug. Introduced in 1945 and widely installed after the war during depot upgrades.
RJ Militaria has an accessible walk-through of these M1 Carbine barrel band types and stock changes. It is well worth bookmarking if you’re sorting parts at a bench.
Maker markings on bands vary. Some contractors stamped their work, others did not. The qsl.net markings list is a classic reference if you are staring at a loupe and a pile of bands. A few examples pulled from those notes:
- Type 1 bands: Inland bands often show UI or simply U, with unmarked examples seen. Winchester and Underwood are commonly unmarked in this era. Rock-Ola bands may read MR or UR. Quality Hardware shows QU or Q-TX on some, with both early and late swivels marked QU or QTK.
- Type 3 bands: Expect a broader set of subcontract marks. Winchester examples are marked W. Standard Products bands can show SDP. You will also see IBM-related marks such as BTB, BEB, OBB, OB-B, WB, and SUB across various small parts in this period. The key is to match style and finish more than chase one initial in isolation.
Putting it to work: a carbine with a Type 3 lugged band was very likely upgraded after 1945. That alone is not a red flag. It is a clue that fits with other postwar features, especially the rear sight.
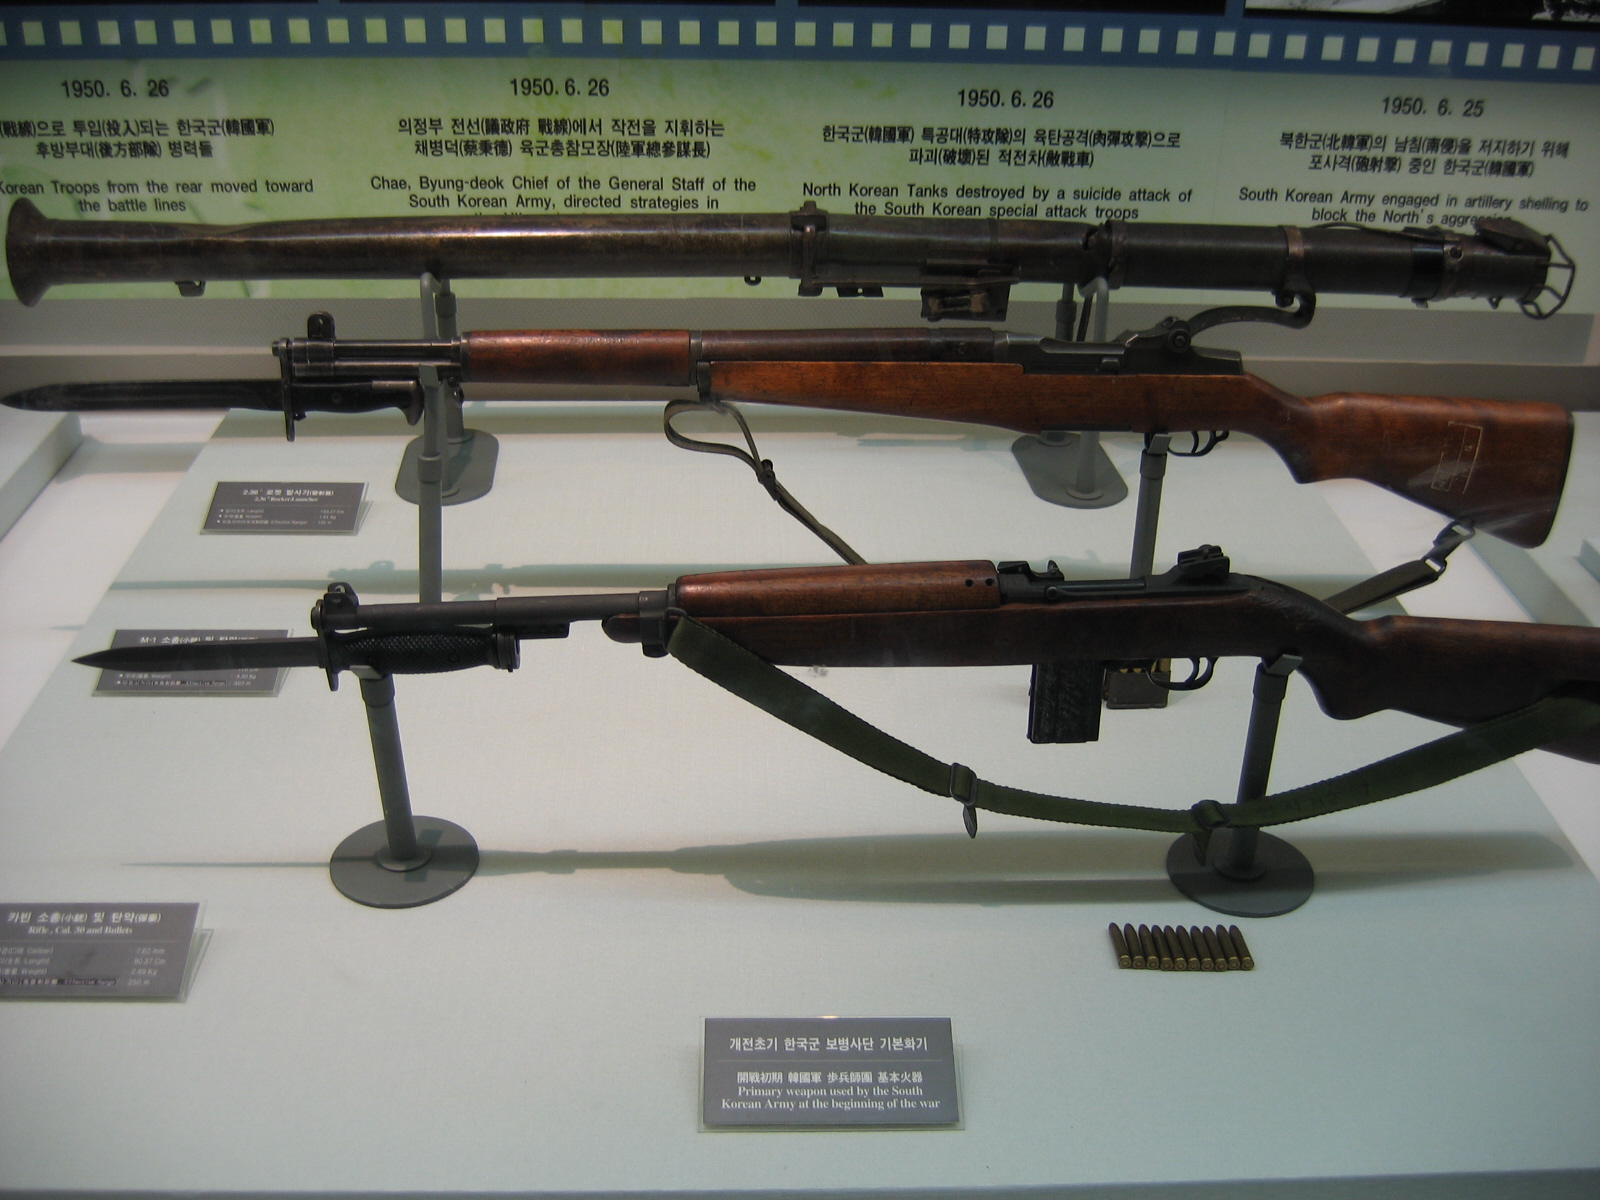
Rear sights: Type I flip vs. Type II and III adjustable
The next big tell is the rear sight. Early carbines carried a simple two-leaf flip sight with apertures for short and longer ranges. Later rifles and most postwar rebuilds wear an adjustable sight with a slide and elevation ramp. Within the adjustable pattern, you will find two flavors: milled and stamped.
- Type I: Flip sight. On these, tiny initials matter. Underwood leaves often show .U. on the leaf. Winchester bases can be W. Irwin-Pedersen combinations show B-IP or IP-B here and there. S’G’ examples can mix letter combinations like B-S’G’ or RG-S’G’ on base or leaf. These micro-marks help you spot period-correct parts.
- Type II: Milled adjustable. Expect Inland marks like HI or PI. Winchester shows CH or an H within a shield on some milled adjustables. Collectors will also see H-in-shield on Rock-Ola, Standard Products, and IBM examples in this period.
- Type III: Stamped adjustable. Common postwar arsenal work. The most frequent mark on these is I.R. CO. often with the drawing number 7160060. You will also run into J.A.O. on the stamped adjustables. Winchester specimens show I.R. CO. and the H-in-shield combination.
Period images of rifles in combat still wearing the original flip sight are not rare, but finds of untouched flip-sight carbines today are less common because so many were upgraded later. RJ Militaria notes that most M1s received adjustable sights after the war, which tracks with what you see on the tables now.
For a deep list of sight maker initials across the three types, the qsl.net M1 Carbine markings page is a handy index.
Stocks: high wood, low wood, and the oiler cut
The stock profile tells a third of the story before you touch the rifle. Collectors commonly group WWII stocks into three patterns:
- Type 1 stock: Early, high wood with the I-cut recess for the oiler and sling. The wood rises higher along the operating slide channel. Attractive, but more fragile in that thin area.
- Type 2 stock: Still high wood, but with the oval oiler cut replacing the I-cut.
- Type 3 stock: Late, low wood with the oval oiler cut. The wood was relieved around the operating slide area to reduce breakage. Most makers shifted to low wood in early 1944.
RJ Militaria lays out these stock types with simple photos that make identification easy, especially when you are learning to see the high wood vs. low wood transition. As with the barrel band and rear sight, a late-pattern low wood stock paired with a stamped adjustable sight fits the postwar upgrade story. A high wood I-cut stock combined with a Type 1 band and a flip sight can indicate earlier configuration, though you still want to verify the rest of the parts.
Small parts that whisper the story: slides and housings
Once the big three line up, it is time to glance at the small parts. These carry maker codes that help you confirm era and likely source. Here are a few practical touchpoints straight from the markings lists:
Slides
Look inside the slide well for the initials. You will see patterns like:
- Inland: PI, often seen inside a circle in the slide well.
- Winchester: W, stamped inside the slide well.
- Underwood: .U., sometimes .U. within a circle, or O.U.
Slide types evolved mechanically, and collectors occasionally reference an early Type I slide by the arm joint dimension noted in some charts. For most of us at a show table, the maker mark and general profile are the quick tells.
Trigger housings
Housings changed shape over time and carry clear marks. A simplified cheat sheet from the qsl notes:
- Type I housing, the early double-bevel style: Inland marked Inland. Winchester marked W. Underwood marked .U. inside the magazine well. Rock-Ola marked ROCK-OLA. National Postal Meter marked N on the right and a number on the left.
- Type II, the single-bevel pattern: Inland still marked Inland. Underwood .U. Winchester W. Rock-Ola ROCK-OLA. NPM with an N and a number. Quality Hardware often Q-NL. Saginaw S’G’ marked S’G’. Irwin-Pedersen marked IP.
- Type III, essentially like Type II but without the bevels on the rear lug: Inland marked Inland vertically. Winchester W sometimes with a number or letter. Underwood .U. Saginaw-style markings show S.G. or S’G’.
These housings often moved from rifle to rifle during service and postwar work. Seeing a Winchester receiver with an Inland housing is not a mismatch to panic over. It is a data point to place alongside the band, sight, stock, and slide.
Rear sight maker marks at a glance
One more time for the detail-oriented. On Type II milled adjustables, Inland marks like HI or PI are common. Winchester and other contractors often show an H inside a shield on milled adjustables. On Type III stamped adjustables, you will frequently see I.R. CO. 7160060 and J.A.O. across many rebuild-era sights. Spotting those stamps helps you date the sight and, by extension, the last time the carbine likely saw official work.
Rebuilds, upgrades, and those later markings
Most M1 Carbines did not stay frozen in their as-issued configuration. After 1945, depots and arsenals updated carbines with sturdier barrel bands and adjustable rear sights. RJ Militaria notes that the vast majority received the Type 3 band after the war, and that adjustable sights are most commonly a postwar upgrade. It is normal to see a receiver from one maker paired with a spread of correct wartime and postwar parts from others.
On the sight itself, later markings such as I.R. CO. with the 7160060 drawing number and J.A.O. are common sights in the literal sense. You may also encounter SA on some postwar sight parts. These clues point to later service and should be read with the rest of the rifle in mind. A mixmaster built on a clean receiver with honest wear can be a wonderful shooter and a historically plausible configuration.
If you like the broader context of arsenal work on U.S. service rifles, the overall story will feel familiar. Our M1 Garand collector guide on postwar rebuilds and evaluation outlines similar upgrade patterns, though the parts and markings differ.
Quick maker cues and avoiding postwar commercial carbines
A wartime GI carbine can share a table with postwar commercial look-alikes. Two names come up often: Universal and Iver Johnson. RJ Militaria points out that both are postwar commercial makers. Universal examples often show a ventilated handguard and a modified bolt, among other differences. If you see a vented handguard on a carbine claiming to be GI, pause and ask more questions.
For the genuine WWII manufacturers, there were ten main GI producers. Inland and Winchester are the names most people start with. From there you encounter Underwood, National Postal Meter, Quality Hardware, IBM, Saginaw variants, Standard Products, and Rock-Ola. Receivers marked Irwin-Pedersen are their own rabbit hole. Many of those were completed under Saginaw’s management, which is why you will see S’G’ on some parts and stocks. The main thing to remember is that GI carbines share parts, and those parts often tell a more accurate story than the roll mark alone.
What to inspect before you buy or shoot
GI M1 Carbines are hardy, but they are machines approaching a century of service life. A careful inspection is good practice. Here is a buyer’s checklist drawn from years at the bench and echoed by experienced hands in the community:
- Field strip with permission. Look for honest, even wear. Excessive fresh park on a single part amid older finish can be a red flag for forced matching.
- Gas system. Check the gas piston castle nut for tightness. A loose nut will cause cycling problems and can signal neglected maintenance.
- Barrel straightness. Sight down the barrel and look for a bend or kink. Subtle bends can happen and will show up on target.
- Rear sight security. Adjustable sights were often staked into the dovetail. If the sight drifts with finger pressure, plan on a fix.
- Bolt lugs. Examine both locking lugs for chips or cracks. Pay attention to the right lug. Excessive wear here is serious.
- Stock integrity. Check for cracks around the upper handguard rivets and at the wrist near the recoil plate. These are common stress points.
- Trigger housing and safety. Ensure the safety moves positively and the trigger returns smartly. Look for cracks around the housing lugs.
- Magazine catch. With a mag inserted, tug down. A worn catch can let the mag drop during firing.
- Handguard fit. Loose handguards rattle and can signal missing or incorrect clips and rivets.
- Bore condition. Dark bores can still shoot, but severe pitting near the throat will sap accuracy.
Any carbine new to you should be fully disassembled, inspected, cleaned, and lubricated before firing. Many issues are minor and easy to correct with the right parts. When in doubt, have a competent gunsmith look it over. These rifles are straightforward to maintain, and a thoughtful setup pays off on the range.
A note on serial ranges and scarcity
Serial ranges can help you frame a carbine, though they should never be the only factor. The M1 Collectors Club data shows Inland at over 2.6 million produced, which is why Inland roll marks are common and make a great entry point for buyers focused on a solid shooter. Winchester totals are notably smaller, around 828,000, and the name tends to nudge prices up. The rest of the wartime makers sit below those Inland numbers by substantial margins. When someone says a carbine is rare, ask what they mean. Is it an uncommon manufacturer, an early configuration that escaped rebuild, or simply a popular name on the receiver?
Practical takeaway for buyers: focus on condition, mechanical health, and a configuration that makes sense. A clean Inland with a correct spread of parts and a tight gas system is a better rifle than a haggard Winchester priced on romance alone.
Putting it all together at the table
Imagine you pick up a carbine marked Inland. It wears a Type 3 barrel band with a bayonet lug and a stamped adjustable rear sight marked I.R. CO. 7160060. The stock is low wood with an oval oiler cut. The slide shows PI in the well. The trigger housing is marked Q-NL. What does that add up to?
You are likely holding a wartime Inland receiver that went through postwar upgrade work. The sight and band place that part of the story after 1945. The low wood stock fits a mid-to-late wartime or postwar timeline. The slide and housing came from other contractors, which is normal. If the rifle passes the mechanical checks and the price reflects an honest rebuild mix rather than a premium for a mythical untouched specimen, you might have found the right carbine for range use without the premium of chasing an early configuration.
Now flip the script. The carbine is a Winchester with a narrow Type 1 band, a flip sight, and a high wood I-cut stock. The parts sprinkled through the rifle carry W, .U., and S’G’ on the small stuff, all consistent with early-war sourcing. That arrangement deserves closer study and will usually command a higher price. Be sure it makes sense as a whole rather than as a set of swapped parts stitched together to look early.
Side notes worth knowing
One last point from the wartime timeline. Simplification was the watchword for the M1 Carbine. As the war progressed, features shifted toward sturdier and easier-to-produce patterns. The conversation around selectors shows up in discussions of the carbine family late in the war, but the everyday buyer’s checklist remains the same: read the band, sight, and stock; confirm the small-part marks; and make a calm assessment of condition.
If you want a compact cheat sheet on part markings, that qsl.net page is worth printing and tucking into your range bag. It captures everything from common slide and trigger housing stamps to the alphabet soup you find on adjustable sights and other hardware.
Closing thoughts from the bench
The M1 Carbine lives a special life in American hands. It is light, lively, and easy on the shoulder, which is why it marched through so many conflicts and then settled into so many closets. That long life explains why you will see so many combinations of parts. Instead of chasing perfection, chase understanding. Learn to read the big three at a glance. Use the small stamps to confirm your hunch. Give the rifle a careful mechanical check. Do that, and you will bring home a carbine you trust and enjoy, not just a name on a receiver ring.